Enabling HA Services with Docker Swarm
The terminology of Docker has become a little confused of late as containers become the new hot topic, for clarity Docker itself is an application that can be used to create, manage and orchestrate containers, and it’s the orchestration that we’re going to be looking at in this post, looking at Swarm; Docker’s native high availability clustering system.

Docker Swarm - What Is It?
If Docker has led to some confusion, Swarm leads to even more confusion. Is it another package? A separate system all together? It’s neither of those things, it’s built in to the normal Docker application and is just another mode that you can run Docker in. The intention is to run multiple machines in swarm mode, and your Container Services will distribute themselves over all nodes included in the swarm. In this sense, a swarm is in effect a cluster of standard Docker nodes, but there are a number of other features baked in that make the system incredibly resilient, including:
- Desired State Configuration - Swarm automatically reconfigured it’s services to the state you define, for example a service containing 10 instances will automatically reconfigure to provide 10 instances in the event that 1 or more go down, or an entire node goes down.
- Highly Scalable - Additional nodes and instances can be added or removed at any time.
- Native Load Balancing - Load is automatically distributed between instances using the Raft Consensus Alogrithm.
- Docker Engine Integration - Swarm is a native part of Docker Engine (the normal Docker system used for Container management)
A Practical Use Case
Rather than drone on with theory, let’s take a look at a practical use case with one of my favourite applications; Ansible Tower, which has been outstandingly containerised by ybalt and is available on both GitHub and Docker Hub (where we’ll be pulling the pre-baked Docker Image from).
In our scenario, we’ll be deploying as follows:
- To three nodes with Docker installed: mc-docker1, mc-docker2 and mc-docker3
- Each node will be installed on a fresh installation of Ubuntu 18.04
- mc-docker1 and mc-docker2 will assume swarm manager roles (more on this shortly)
- The nodes will be addressed 192.168.1.221 - 192.168.223
- We will be using the default latest tagged image from Docker Hub of the ansible-tower image
- Ahead of time, a hack of a load balancer has been implemented under the name mc-cluster, including the 3 hostnames of the mc-docker* nodes
Installing Docker and Configuring Swarm
So let’s get started, on each node we want to install the docker.io package:
# Install docker on each node
sudo apt-get install docker.io
With the installation complete, we now need to configure our first node; mc-docker1 as a manager node. This allows the ability to manage our new swarm, we always need at least one manager node in the swarm in order to manage it:
# Configure mc-docker1 as the swarm manager
welsh@mc-docker1:~# sudo docker swarm init --advertise-addr 192.168.1.221
Swarm initialized: current node (kvi2juavxdeffsvzuwz3ubhk7) is now a manager.

To add a worker to this swarm, run the following command:

    docker swarm join --token SWMTKN-1-69ptxmbw4ycqf6sfl8koqobfxsxo5x1z8cz0248o5eyxatnpe7-art1j7ocuifua3m2ks25uj2lh 192.168.1.221:2377

To add a manager to this swarm, run 'docker swarm join-token manager' and follow the instructions.
There’s a few critical points to take in here:
- We’re specifying the –advertise-addr argument to state that we always want this node to allow the Docker API to listen on one specific IP address, this is a good practice, especially in multi-IP systems (and in my opinion, in any system ever).
- A Worker Token is generated, which can be used to add Worker Nodes to the swarm
- We are given options to add additional nodes in to the swarm as either additional Managers or as Workers (which are non-manager nodes). Workers can consume compute resources in the swarm, but cannot perform management tasks.
NOTE: Nodes are joined to a swarm using the RPC Protocol by default over TCP port 2377, if you are using the UFW firewall, this will need to be allowed:
# Allow Docker API through UFW Firewall
ufw allow 2377/tcp
ufw reload
It is ill advised to have only one Manager in the swarm as if this node becomes unavailable we will be unable to manage the cluster at all, so let’s get a second manager added to the swarm:
# Generate a manager join token from the existing Manager node (mc-docker1)
welsh@mc-docker1:~# sudo docker swarm join-token manager
To add a manager to this swarm, run the following command:

    docker swarm join --token SWMTKN-1-69ptxmbw4ycqf6sfl8koqobfxsxo5x1z8cz0248o5eyxatnpe7-8vz0bbkhkoy97jjt5kex316s3 192.168.1.221:2377

# Configure mc-docker2 as an additional swarm manager
welsh@mc-docker2:~$ sudo docker swarm join --token SWMTKN-1-69ptxmbw4ycqf6sfl8koqobfxsxo5x1z8cz0248o5eyxatnpe7-8vz0bbkhkoy97jjt5kex316s3 192.168.1.221:2377
This node joined a swarm as a worker.
Now we have a single node left which we will use as a worker node, using the Worker Token generated earlier:
# Configure mc-docker3 as a swarm worker
welsh@mc-docker3:~$ sudo docker swarm join --token SWMTKN-1-0vn9eavrvz4wg1u336z4xapolet23q5y2xpx729iz8sr0xhkvl-exidn5nb9fny9d44u8urq92vv 192.168.1.221:2377
This node joined a swarm as a worker.
Looking on mc-docker1, we can see the state of the swarm if we execute docker node ls:

If we run this command on mc-docker2, we will see mc-docker2 as the Leader node
Obtaining The Image
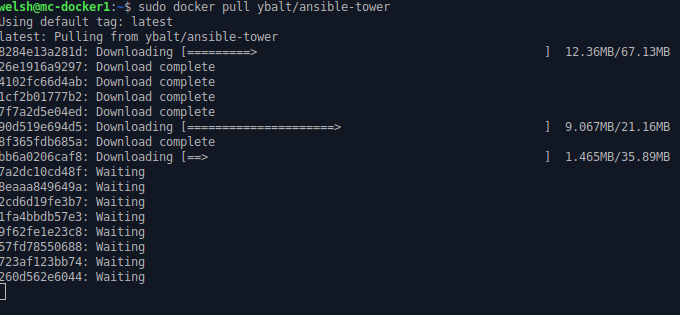
Now we have a cluster ready for use, we need something to deploy to it, so let’s obtain our Ansible Tower image from Docker Hub, working on mc-docker1 we can use docker pull to obtain the image:
# Download containerised Netbox from docker hub https://hub.docker.com/r/ybalt/ansible-tower/
welsh@mc-docker1:~$ sudo docker pull ybalt/ansible-tower

Creating A Distributed Service
At present, we have an image located only on mc-docker1, our goal is to have a clustered service distributed evenly over all 3 nodes. This can be achieved using the docker service command:
# Create HA Ansible Tower Service
sudo docker service create --replicas=6 -p 443:443 --name ansible-tower ybalt/ansible-tower
Again, there’s a couple of critical points to take in here:
- The –replicas argument specifies how many instances of the Container will be scaled out over the swarm
- The -p 443:443 argument, specifies the Container NAT external:internal TCP port, meaning that the service will be exposed on port 443 from port 443 on the container
- The –name argument, specifies that the service will be named ansible-tower
- Finally, we’re specifying the image that will be used to create the Containers that will populate the swarm
Upon a successful execution, the image will be pushed to each node in the swarm and Containers will be created in a balanced manner (determined by the previously mentioned Raft Consensus Algorithm):

Running docker service ps ansible-tower from a Manager Node will confirm the distribution of Containers in the swarm:

Accessing the Service
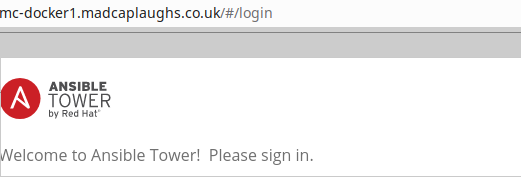
Now that our service is up, we can access each of the nodes and gain access to the same service, despite these being hosted in different Containers, we are in fact accessing the same application scaled out over multiple instances:


Now since we have placed all three of these nodes behind a load balancer, it is irrelevant which of the nodes we hit upon accessing the load balanced service, we will still gain access to the same application:

High Availability - Putting It To The Test
So let’s test just how highly available our service is? If we pull the NIC on a mc-docker3, the Containers will die within a couple of seconds, however the Raft Consensus Algorithm will jump in and enforce our Desired State of 6 replicas and simply recreate them on another node in the swarm:

A proviso to be aware of are that if mc-docker3 is now reintroduced to the swarm, the Containers will not automatically be migrated back, the service will need to be removed and recreated.
It is also worth being aware that even a manager node (including the last manager node) can go offline and the service can remain online, however as previously stated if the last manager node goes offline there will be no way to manager the swarm or add additional manager nodes back to the swarm.
In Conclusion
As you can hopefully see, with very little configuration you can create highly available and resilient systems with very little configuration required using Docker Swarm Mode. Swarm mode is an incredibly powerful function of and Docker, and Docker provides incredibly detailed documentation to take you beyond this post.